
You are here: Start » Tutorial Exercises » Image Modification Using the HMI
Image Modification Using the HMI
Aim
Create an application that will perform several image modifications using information from the HMI.
Input
The Lena image from the TestImage filter.
Output
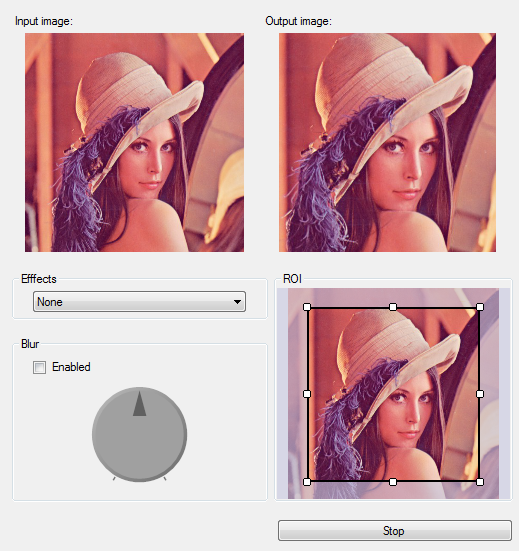
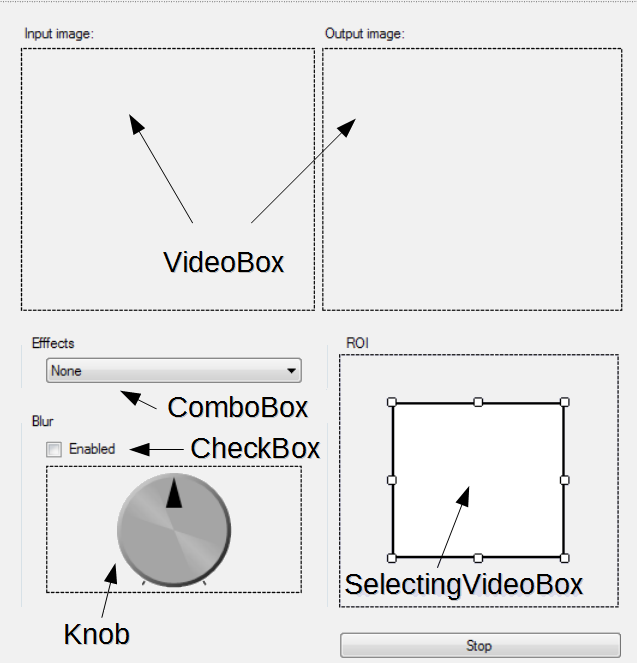
An application with the HMI as shown in the image below.
Hints
In this exercise, most useful HMI controls are presented:
- ImpulseButton - a button control used to terminate application,
- ComboBox - selecting image modification to be applied to the input image,
- CheckBox - a two-state control that allows changing the process' state,
- VideoBox - presents an image in the HMI,
- Knob - allows changing of a real value.
In this exercise all communication with the HMI should be performed in Main macrofilter.
To create an application that uses HMI controls, a loop generator should be added to the project.
In this example, variant macrofilters should be used to perform actions depending on the state of the HMI controls.
Labeling connections is explained in this article.
Solution (FIS)
Creating basic program
-
Add the TestImage filter to the project.
-
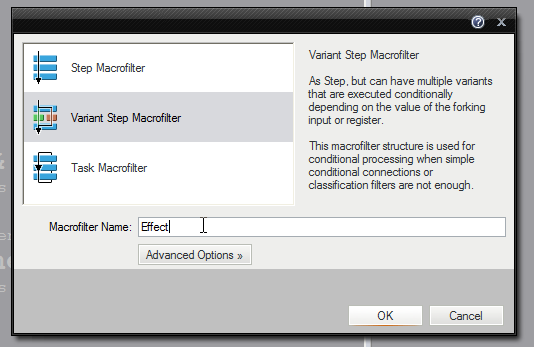
Create a new Variant macrofilter named Effect.
-
Open the Project Explorer and click the Create New Macrofilter... button.

-
In the new window select Variant Macrofilter and select its name: Effect.
-
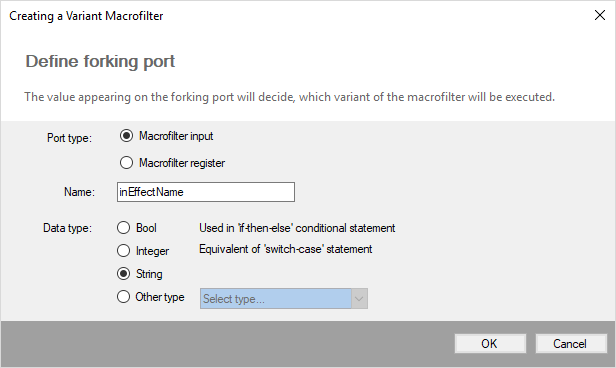
Define an inEffectName fork of the String type.
-
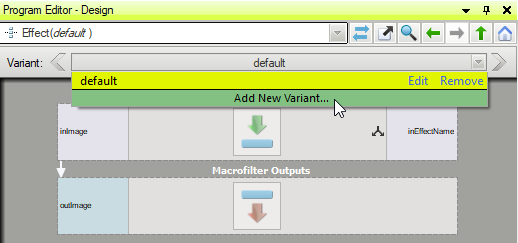
Add an inImage input and an outImage output.
-
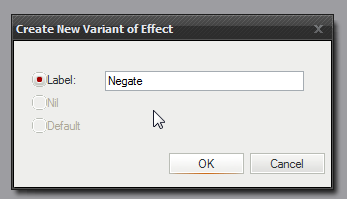
Click "Add New Variant.." in the Macrofilter Navigator.
-
Create "Negate" variant.
-
Add the NegateImage filter to this variant and connect its inputs and outputs.
-
-
Add new variants to the Effect macrofilter:
-
"Rotate" with the RotateImage filter,
-
"Flip" with the MirrorImage filter,
-
"Mono" with the SelectChannel filter.
-
-
In the "default" variant of the Effect macrofilter connect input with output to pass the input image without any changes.
-
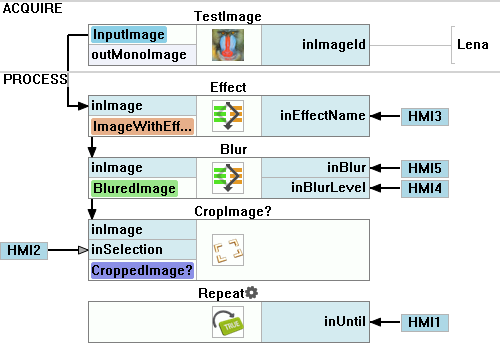
Add the Effect macrofilter to the program and connect it with outRgbImage.
-
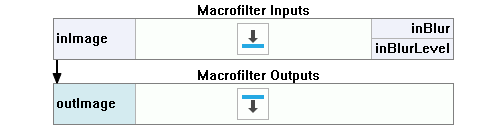
Create a "Blur" variant macrofilter with a Bool type fork input. Add inBlurLevel and inImage inputs. Create a new outImage output. Change the "False" variant to "default" by clicking "Edit" in the variant dropdown menu (see the image in step 2.5). Set up the variants as follows:
-
In the "default" variant, the input image should be passed to the output.
-
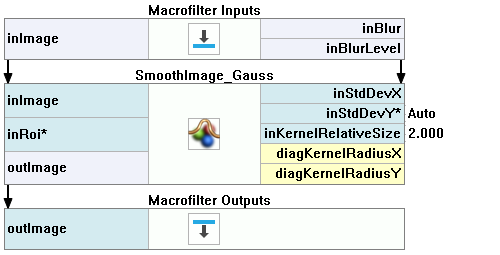
In the "True" variant, the input image should be blurred using SmoothImage_Gauss. Show the filter's inStdDevX input and connect it to the macrofilter's inBlurLevel input.
-
-
Add the Blur macrofilter to the program and connect it with the Effect macrofilter.
-
Add the CropImage filter to the program and connect it to the Blur macrofilter's output.
-
Add the Repeat filter to process the program in a loop. Connect the value from ImpulseButton to inUntil so that the program stops when the button is pressed.
Creating the HMI form
-
Open the HMI Designer using the main toolbar.

-
From the HMI Controls window add the following controls:
-
Two Label controls and set their Text properties to: "Input image" and "Output image" in the Properties window,
-
Two VideoBox controls,
-
A GroupBox named "Effects" with ComboBox,
-
A GroupBox named "Blur" with Knob and CheckBox named "Enabled",
-
A GroupBox named "ROI" with SelectingVideoBox.
-
An ImpulseButton named "Stop".
The image below shows positions and sizes of the added controls.
-
-
Fill the List property of the ComboBox control with the names of Effect variants (without default). Values must be exactly the same as variant names. Connect the outText output to the Effect macrofilter's inEffectName input. Select value 0 in the Selection property. Add a "None" option to disable the effects. When "None" is selected, the "default" variant is executed.
-
Connect the inImage input of the first VideoBox to outRgbImage of the TestImage filter. In the Properties window of the VideoBox set SizeMode to StretchImage.
-
Connect the inImage input of the second VideoBox to outImage of the CropImage filter. In the Properties window of the VideoBox set SizeMode to StretchImage.
-
Connect outChecked of the Checkbox to fork port of Blur macrofilter. Connect outValue of the Knob control to inBlurLevel of the Blur macrofilter. Get inside the macrofilter and connect inBlurLevel with inStdDevX.
-
Connect outImage of the Blur macrofilter to inImage of the SelectingVideoBox control. Connect outSelection to inSelection of the CropImage filter. In the Properties window of the SelectingVideoBox control, change the default value of Selection by clicking on the "..." button and set the default dimensions of a rectangle, and change the SizeMode property to StretchImage.
-
Connect outValue of the ImpulseButton control to inUntil of the Repeat filter.
Macrofilter Main creates an application loop and gathers information from HMI.
Macrofilter Blur(True) blurs an image.
Macrofilter Blur(default) passes an input image to the output without modifications.
Further Readings
- Image Processing - A comprehensive introduction to Image Processing.