You are here: Start » Program Examples » WebHmi Handling Events
WebHmi Handling Events
Aim:
The task of this example is to prepare an application that is based on the WebHMI Event Handling mechanism.
Input:
The program uses images acquired by the TestImage filter.
Output:
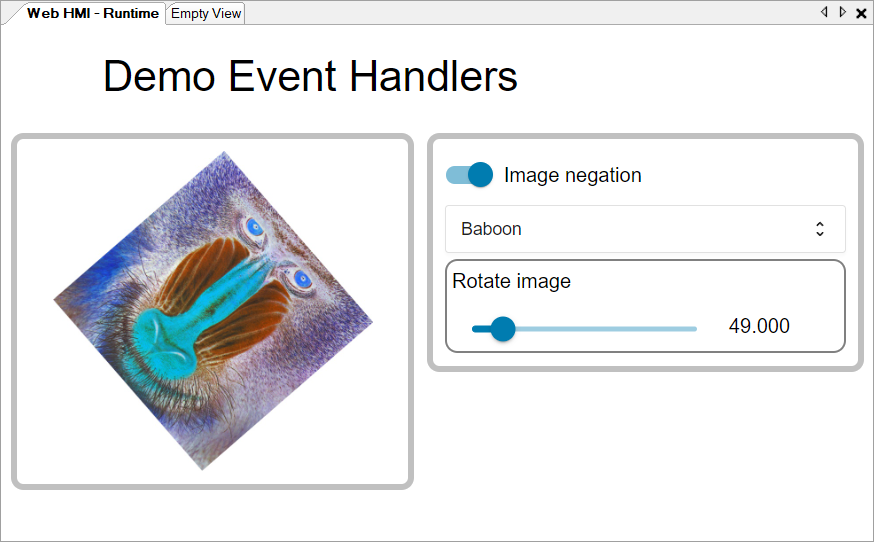
The program with the WebHmi that uses event handling on controls:
Hints:
In the following articles, you can find information about designing WebHmi and Event Handling mechanism:
Solution (FIS):
-
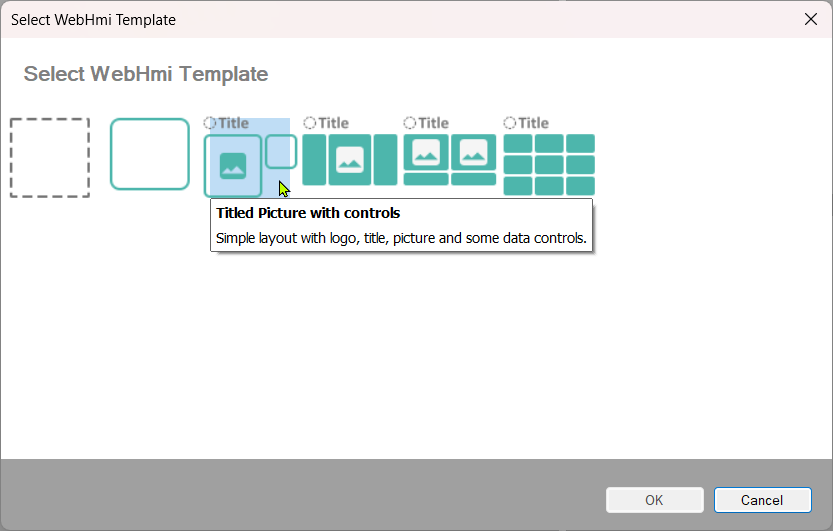
To add a WebHMI subsystem, choose Edit » Add Web HMI... and select a WebHMI template that fits the target layout. The template is just a starting point that can be freely modified. The Titled Picture with controls were used:
-
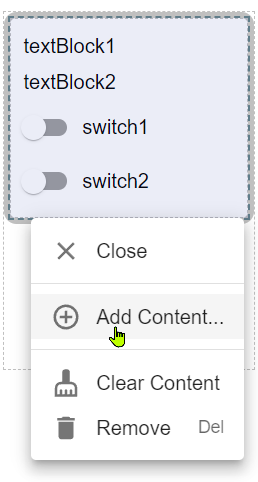
Choose stackPanel1, click
 action button, and choose Add Content... option:
-
From the WebHMI controls menu, choose ComboBox control.
-
When ComboBox1 is added, go into properties and modify it:
- In Items replace options with: Baboon, Lena, Peppers, Plane;
- Set InitialValue and SelectedValue to 1;
- Create WebHmi Event handler for SelectedValueChanged named "ChangeDisplayedImage".
-
Choose stackPanel1 and add Border control. Specify in Properties for border1:
- BorderStyle to Solid;
- BorderThickness to 2px;
- CornerRadius to 10px;
- BorderBrush color by clicking "3 dots" icon.
-
Choose border1, click
action button, and choose Set Content.... From menu, choose
StackPanel. -
Choose StackPanel3 and add TextBlock control. In textBlock1 control, change in Properties Text to "Rotate image**.
-
Choose StackPanel3 and add TablePanel control. For tablePanel2 change in Properties ColumnDefinitions to "200px 100px".
-
Choose tablePanel2 control and add Slider control. Similarly, add TextBlock control to tablePanel2.
-
Choose slider1 control and in Properties change:
- Margin to "2px 10px 0px 10px";
- Maximum to 359;
- Create WebHmi Event handler for ValueChanged named "SliderRotateImage".
-
Choose tablePanel1 and modify ColumnDefinitions to "auto 350px".
-
Choose Switch1 control and in Properties:
- Change Text to "Image negation";
- Attach WebHmi Event handler to Click named "ChangeDisplayedImage".
-
Choose Switch2 control, click
action button, and choose Remove. -
Prepare the program with the macrofilters attached below.
-
Connect the program with the created WebHmi:
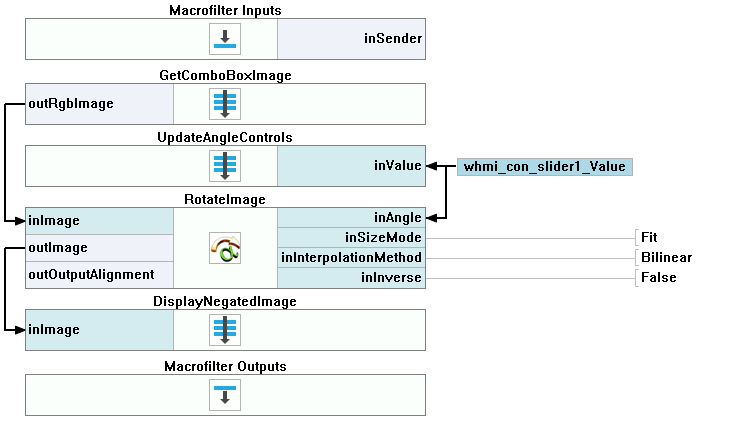
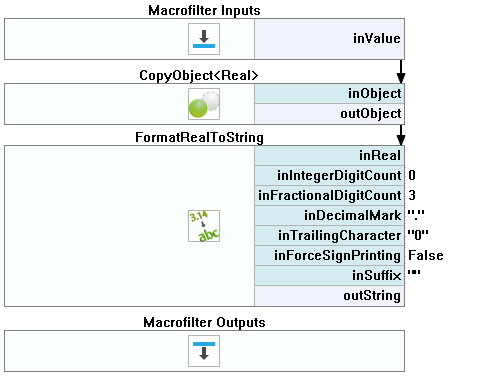
- In UpdateAngleControls macrofilter, connect CopyObject::Real filter output outObject to slider1 control inValue input;
- In UpdateAngleControls macrofilter, connect FormatRealToString filter output outString to textBlock2 control inText input;
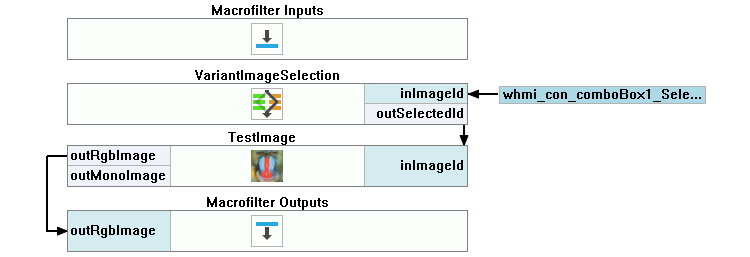
- In GetComboBoxImage macrofilter, connect VariantImageSelection filter input inImageId to comboBox1 control outSelectedIdentifier output;
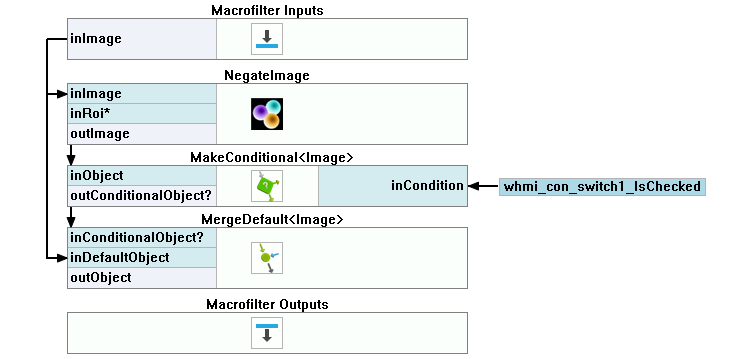
- In DisplayNegatedImage macrofilter, connect MakeConditional::Image filter input inCondition to switch1 control outIsChecked output;
- In DisplayNegatedImage macrofilter, connect MergeDefault::Image filter output outObject to pictureBox1 control inSource input;
- In SliderRotateImage event handler, connect UpdateAngleControls filter input inValue and RotateImage filter input inAngle to slider1 control outValue output.
Macrofilter Main.
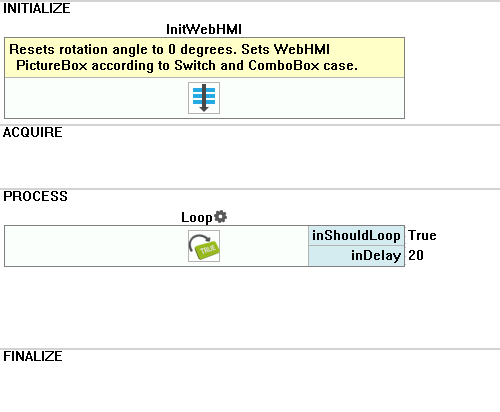
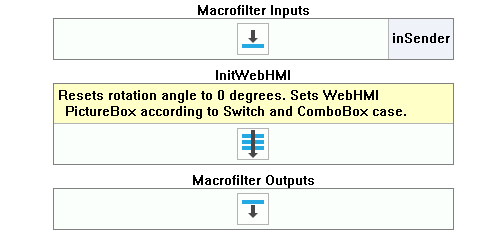
Macrofilter InitWebHMI
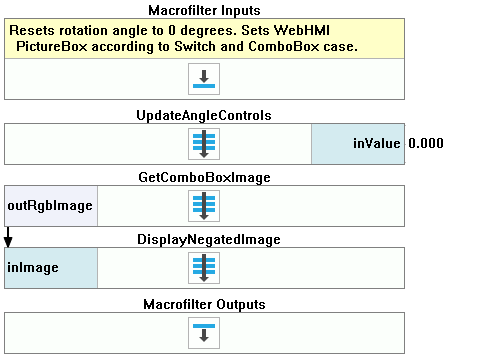
Macrofilter UpdateAngleControls
Macrofilter GetComboBoxImage
Macrofilter DisplayNegatedImage
Event handling macrofilter ChangeDisplayedImage
Event handling macrofilter SliderRotateImage