
You are here: Start » Technical Issues » Working with Hilscher Devices
Working with Hilscher Devices
Introduction
To work with a Hilscher device make sure that you have the recommended driver installed, newest SYCON.net, and firmware prepared. Profinet requirements are written down in Hilscher_Channel_Open_Profinet documentation.
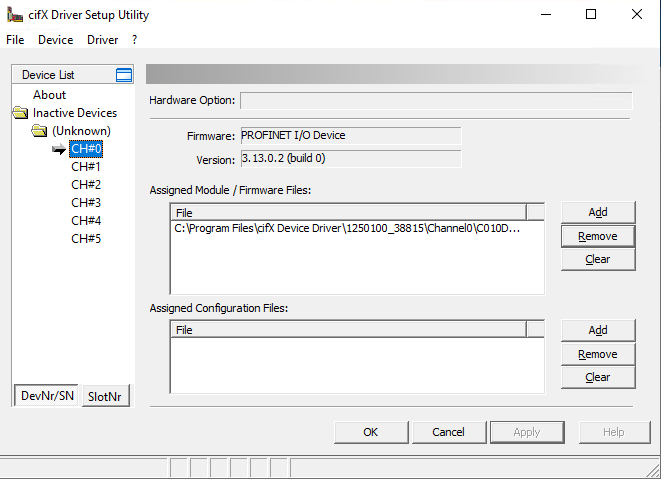
The easiest way to install firmware to the cifX Driver is using the cifX Driver Setup software - the Windows Search in the start menu should find this tool, otherwise it is located in C:\Program Files\
cifX Device Driver directory.
In the cifX Driver Setup Utility select the channel you want to configure (usually channel 0 - CH#0) and remove preexisting firmware by clicking "Clear".
To add a new firmware file click "Add", navigate to the downloaded profinet slave firmware and click "Open".
Finally, click "Apply" - the button should turn disabled.
Generating channel configuration files
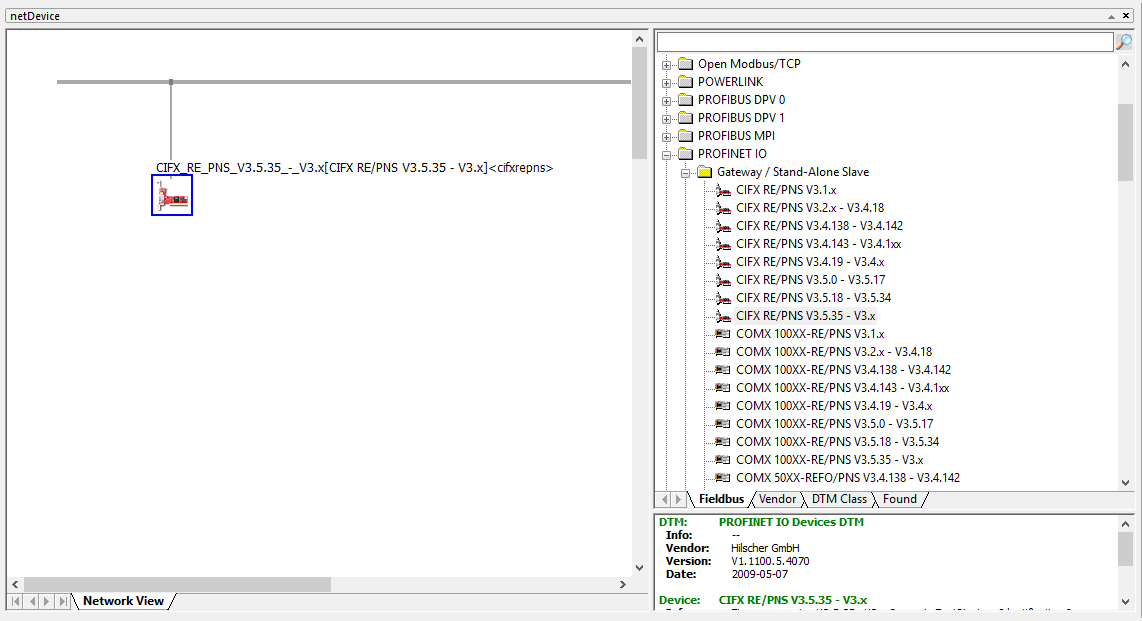
Channel configuration files are generated in SYCON.net software. Firstly, pick a proper slave device using a PCI card, here we use the Profinet Stand-Alone Slave, and drag it to the gray bus on the "Network View".
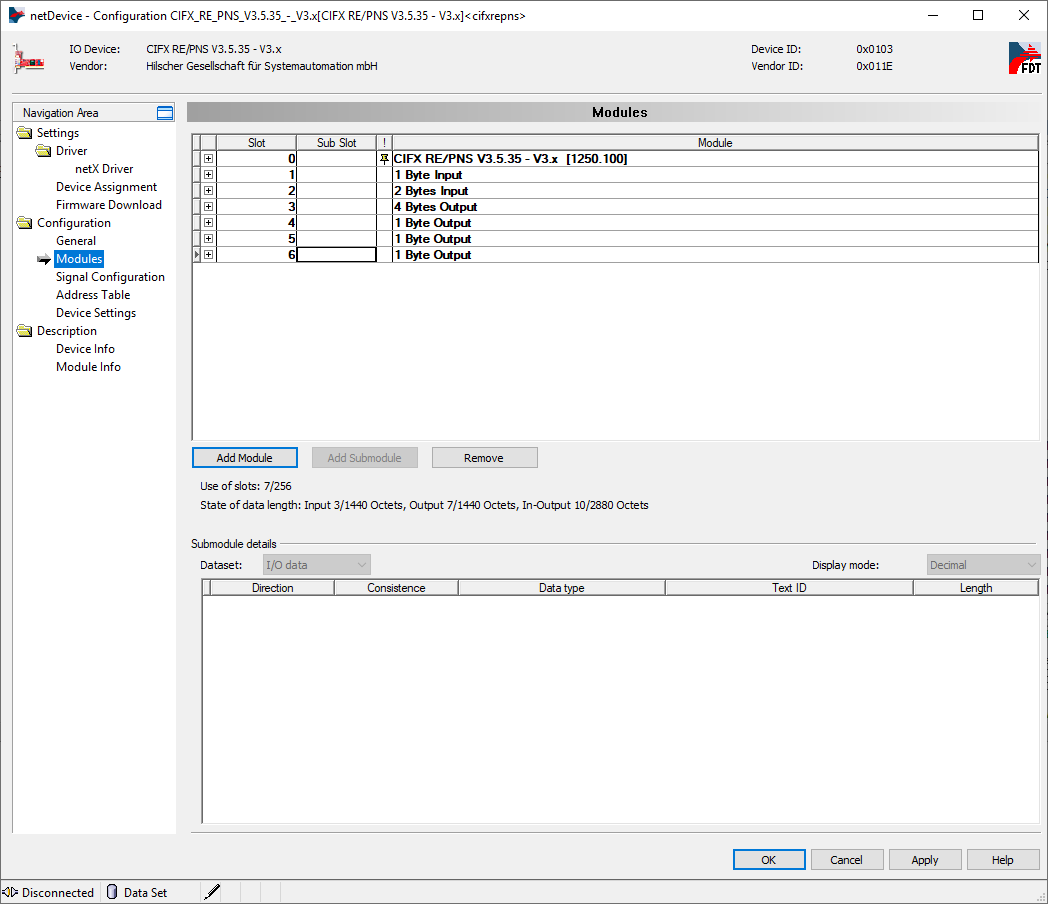
To open card configuration, double click on its icon and select the "Configuration/Modules" category in the Navigation Area on the left side of the dialog. In the main window you can add individual modules. Remember that in Profinet, Slot configuration must match the configuration from your master device, otherwise the connection will not work. For boolean indicators we recommend "1 Byte Output" or "1 Byte Input".
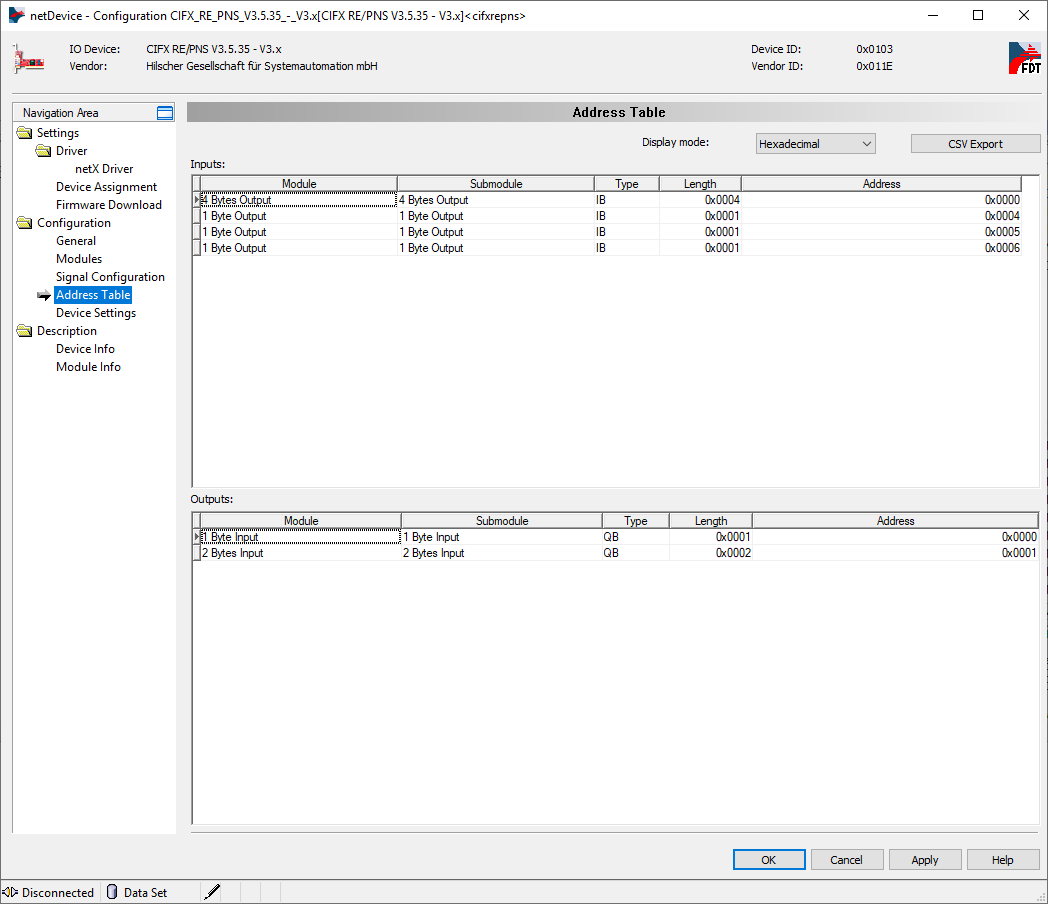
You can see the final address table (addresses on the Hilscher device where input or output data will be available) in the "Configuration/Address table" category. If you plan to use IORead and IOWrite filters, for example Hilscher_Channel_IORead_SInt8, note the addresses. You can switch the display mode to decimal, as FabImage Studio accepts decimal addressing, not hexadecimal. FabImage Studio implementation of Profinet checks whether the address and data size match. In the sample configuration below, writing a byte to address 0x002 would not work, because that module address starts at 0x001 and spans 2 bytes. Moreover, FabImage Studio prohibits writing with a SlotWrite filter to input areas, and reading with a SlotRead filter from output areas. Click "OK" when you have finished the proper configuration.
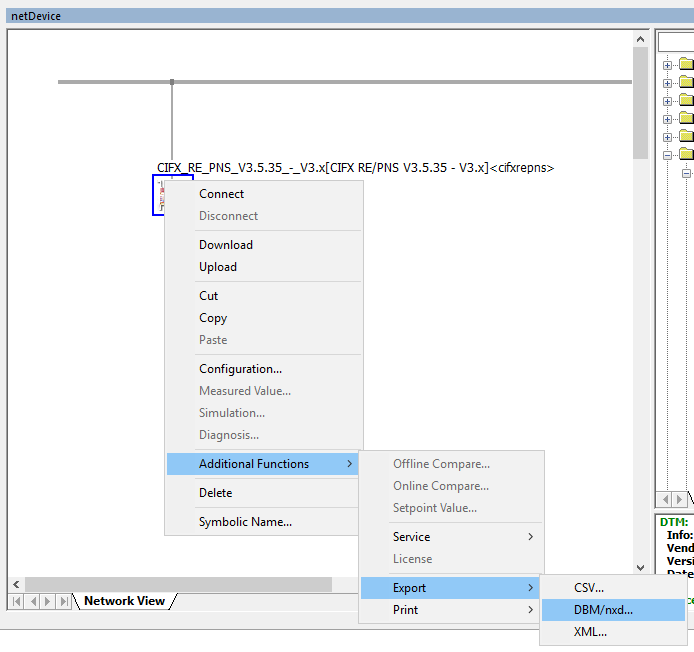
The final step is to generate configuration files for FabImage Studio. You can to this by right clicking on the device icon, then navigating to "Additional Functions->Export->DBM/nxd...", entering your configuration name and clicking "Save". You can now close SYCON.net for this example, remember to save your project before, so that it is easier to add new slots.
Filters in FabImage Studio
At the beginning of every program where you want to use filters intended for communication over a Hilscher card you need to add Hilscher_Channel_Open_Profinet filter.
The configuration files generated in the previous step are now required in inConfig (xxx.nxd) and inNwid (xxx_nwid.nxd) properties of that filter.
These files are used when there is no connection between a card and a Profinet master.
In that case FabImage Studio updates the card configuration and starts the communication.
For IO, we recommend SlotRead and SlotWrite filters, as they are more convenient. For example, the Hilscher_Channel_SlotWrite_SInt8 filter writes 8 bytes of signed data to the selected slot.
Slot numbers match those in the "Configuration/Modules" category of card configuration in SYCON.net program.
| Previous: Remote License Upgrade | Next: Machine Vision Guide |