
You are here: Start » Tutorial Exercises » Finding Razor Head Defects
Finding Razor Head Defects
Aim:
Develop an application that finds two types of product defects:
- Check if both razor arms are not broken,
- Check if smaller arms are not connected.
Show the inspection results on the HMI.
Input:
Images of razor heads with defects. Objects are lit using a backlight. Example defects are marked in red.

Images are stored in the razor directory.
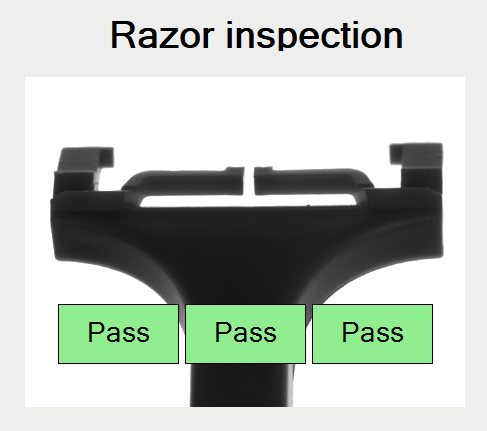
Output:
The application should show appropriate information if any of the defects are identified. Design a simple HMI that shows the result of each inspection.
Hints:
This exercise presents one of the typical vision problems. This task uses a common algorithm schema:
- Find the element using the Template Matching technique,
- Check for defects presence using high-level tools.
You can label outputs by clicking on them twice.
Solution (FIS):
-
Load images from the directory using the EnumerateImages filter. Place it in the ACQUIRE section.
-
Add the LocateSingleObject_Edges1 filter to the PROCESS section and connect to it an output of the EnumerateImages filter.
-
Create a template model using the Model Definition Window. To access it, go to the Properties window and click the "..." button next to inEdgeModel. Create the model as shown in the image below:
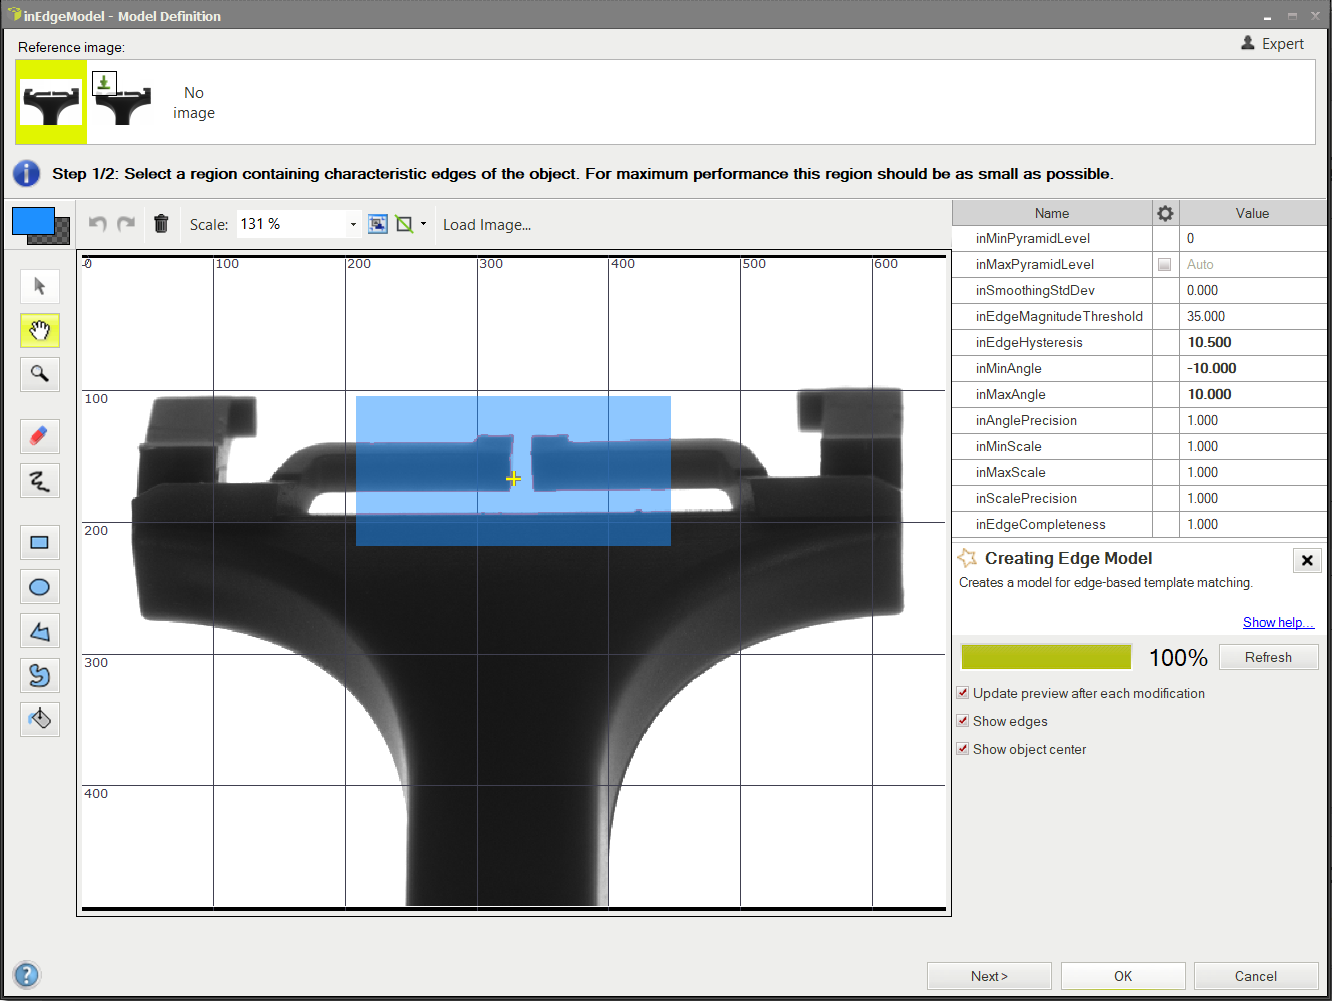
NOTE: To get more information on how to create Template Matching models, please refer to the Creating Models for Template Matching article.
-
Add the CheckPresence_PixelAmount filter to check if the distance between inner arms is filled with white pixels.
- Set inRoi to the purple rectangle presented below,
- Set inMinBrightness to 250 because we want to find only a very bright region,
- Set inMinAmount to 0.4.
This filter checks if a white color covers more than 40% of the selected ROI.
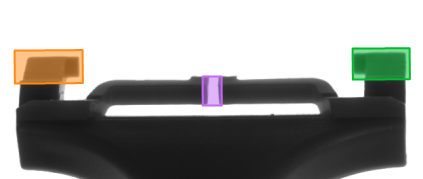
-
Add two other CheckPresence_PixelAmount filters to check the presence of arms.
- Set inRoi to the orange and green rectangles presented in the image above,
- Set inMinBrightness to 0,
- Set inMaxBrightness to 100,
- Set inMinAmount to 0.5.
-
Connect outObject.Alignment with the input inRoiAlignment of each CheckPresence_PixelAmount filter. Thanks to this, even if the object moves or rotates, the alignment will automatically set the correct ROIs in the right places.
-
Open the HMI Designer by clicking its icon in the Application Toolbar. Add a View2DBox and connect it with the output of EnumerateImages.
-
Add three PassFailIndicator HMI controls and connect them with outIsPresent outputs of the CheckPresence_PixelAmount filter.
-
Add a Label with "Razor inspection" text.
Macrofilter Main

Further Readings
- Template Matching - Most detailed description of the Template Matching technique.